During ABAP development, sometimes we need to generate a unique ID which is needed as primary key for a custom table we created. Unlike in other databases such as mySQL that a field can be set as auto-increment once defined as primary key. In SAP environment, this feature is missing in table creation so we need to setup a number range that generates distinct number which increments and used as primary key.
In this next screen, set the following parameters:

Setting the Number Ranges Interval
After creating the number range definition, the next step is to set the intervals for this object. Go back to the main window, click the button Number Ranges button on the toolbar.

Click on "Save" button. And the number range interval you have just declared will be listed in the Number Range object 's number intervals list. You can declare multiple intervals but be sure there will be no overlapping between intervals.

Implementing the number range in a program
After defining the number range object, it’s time to discuss how to use number range object in ABAP code. The following function modules are used in implementing the number range object:
A Number Range is a sequence of numbers with a start and an end. It shows the current number that is being used in your program. Letters cannot be added as a prefix or suffix in generating number ranges like, A-001, A-002, etc.
So in this tutorial, I divided into four parts which I will discuss one by one. It includes the following topics:
Setting the Number Range Definition
First, type the tcode SNRO into the command prompt.
So in this tutorial, I divided into four parts which I will discuss one by one. It includes the following topics:
- Setting the number range definition
- Setting the number range object
- Transporting the number range to other system
- Implementing the number range in a program
Setting the Number Range Definition
First, type the tcode SNRO into the command prompt.
Then, enter a name in the input field for your number range object. Note that it must begin with Y or Z just like in other objects that indicates it is a customer development. After which, click the Create button .
In this next screen, set the following parameters:
a. Short Text – short description for the number range (20 characters).
b. Long Text – long description for the number range (60 characters).
c. Number length domain – Name of the domain, which determines the length of the number range number
d. Warning % - Percentage of no remaining in a number range, upon reaching which in number assignment is given. Example, you have defined an interval of 1 to 1000. If you want to issue a warning at the number 900, enter 10% here.
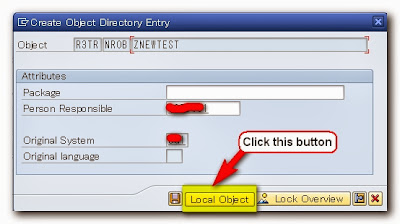
Click on the Save button  in the toolbar menu to save the number range definition. A popup screen will be displayed which you need to add a package. But for this tutorial, just click the Local Object below.
 in the toolbar menu to save the number range definition. A popup screen will be displayed which you need to add a package. But for this tutorial, just click the Local Object below.
Setting the Number Ranges Interval
Then click the Add Interval button  on this screen.
 on this screen.
Enter an integer for the column “No”, “From Number” and “To Number”. This is the number range interval set for this object. Then press enter and click the check button  .
.
 .
.
Click on "Save"
 button. And the number range interval you have just declared will be listed in the Number Range object 's number intervals list. You can declare multiple intervals but be sure there will be no overlapping between intervals.
Transporting the number range to other system
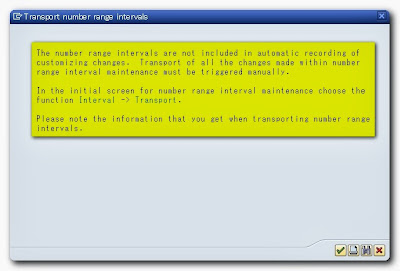
The following warning screen is displayed once you save the number ranges. It states that the interval is not automatically added on the transport request no. So we need to add the intervals manually on the transport request number in order to be transported to other system.


Go back again into the main screen. On the file menu, click menu Interval->transport as seen below.
This transport message appears afterwards. Just click the Yes button below to include the intervals in a transport request no.

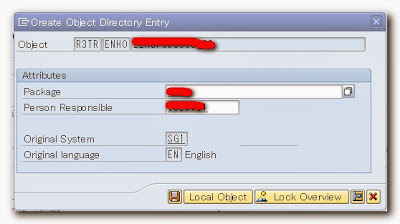
After which, it will create a transport request number which adds the number range interval. Thereby, it can be transported now to other system.
Implementing the number range in a program
After defining the number range object, it’s time to discuss how to use number range object in ABAP code. The following function modules are used in implementing the number range object:
- NUMBER_RANGE_ENQUEUE -function sets a lock on the number range object.
- NUMBER_GET_NEXT - function call the next number in the number range interval is read and passed into an ABAP variable.
- NUMBER_RANGE_DEQUEUE - function and removing the lock on the relate SAP number range object.
1 2 3 4 5 6 7 8 9 10 11 12 13 14 15 16 17 18 19 20 21 22 23 24 25 26 27 28 29 30 31 32 33 34 35 36 37 38 39 40 41 42 43 44 45 46 47 48 49 50 51 52 53 54 55 56 57 58 59 60 | DATA: gv_id TYPE i. CONSTANTS: c_obj TYPE inri-object VALUE 'ZNEWTEST', c_no TYPE inri-nrrangenr VALUE '01'. START-OF-SELECTION. PERFORM f_getnextnum USING gv_id c_obj c_no. WRITE gv_id. *&--------------------------------------------------------------------- *& Form f_getnextnum *&--------------------------------------------------------------------- * text *---------------------------------------------------------------------- FORM f_getnextnum USING p_nextnum TYPE i p_rangeobj TYPE inri-object p_rangeno TYPE inri-nrrangenr. CALL FUNCTION 'NUMBER_RANGE_ENQUEUE' EXPORTING object = p_rangeobj EXCEPTIONS foreign_lock = 1 object_not_found = 2 system_failure = 3 OTHERS = 4. IF sy-subrc NE 0. MESSAGE ID sy-msgid TYPE sy-msgty NUMBER sy-msgno WITH sy-msgv1 sy-msgv2 sy-msgv3 sy-msgv4. ENDIF. CALL FUNCTION 'NUMBER_GET_NEXT' EXPORTING nr_range_nr = p_rangeno object = p_rangeobj IMPORTING number = p_nextnum EXCEPTIONS interval_not_found = 1 number_range_not_intern = 2 object_not_found = 3 quantity_is_0 = 4 quantity_is_not_1 = 5 interval_overflow = 6 buffer_overflow = 7 OTHERS = 8. IF sy-subrc <> 0. MESSAGE ID sy-msgid TYPE sy-msgty NUMBER sy-msgno WITH sy-msgv1 sy-msgv2 sy-msgv3 sy-msgv4. ENDIF. CALL FUNCTION 'NUMBER_RANGE_DEQUEUE' EXPORTING object = p_rangeobj. IF sy-subrc <> 0. MESSAGE ID sy-msgid TYPE sy-msgty NUMBER sy-msgno WITH sy-msgv1 sy-msgv2 sy-msgv3 sy-msgv4. ENDIF. ENDFORM. |


